
Begin with the project, then the room
A workshop for occasional hand-tool repairs needs a different arrangement from a room for building cabinets. List the next three projects you actually intend to make. Identify the materials, tasks and equipment each project requires. Do not design around a machine you might buy someday.
Measure the space and mark fixed features before considering any layout. Our diagrams are conceptual starting points, not construction drawings or validated machine-clearance plans. The right arrangement depends on your tools, your room and the instructions for each piece of equipment.
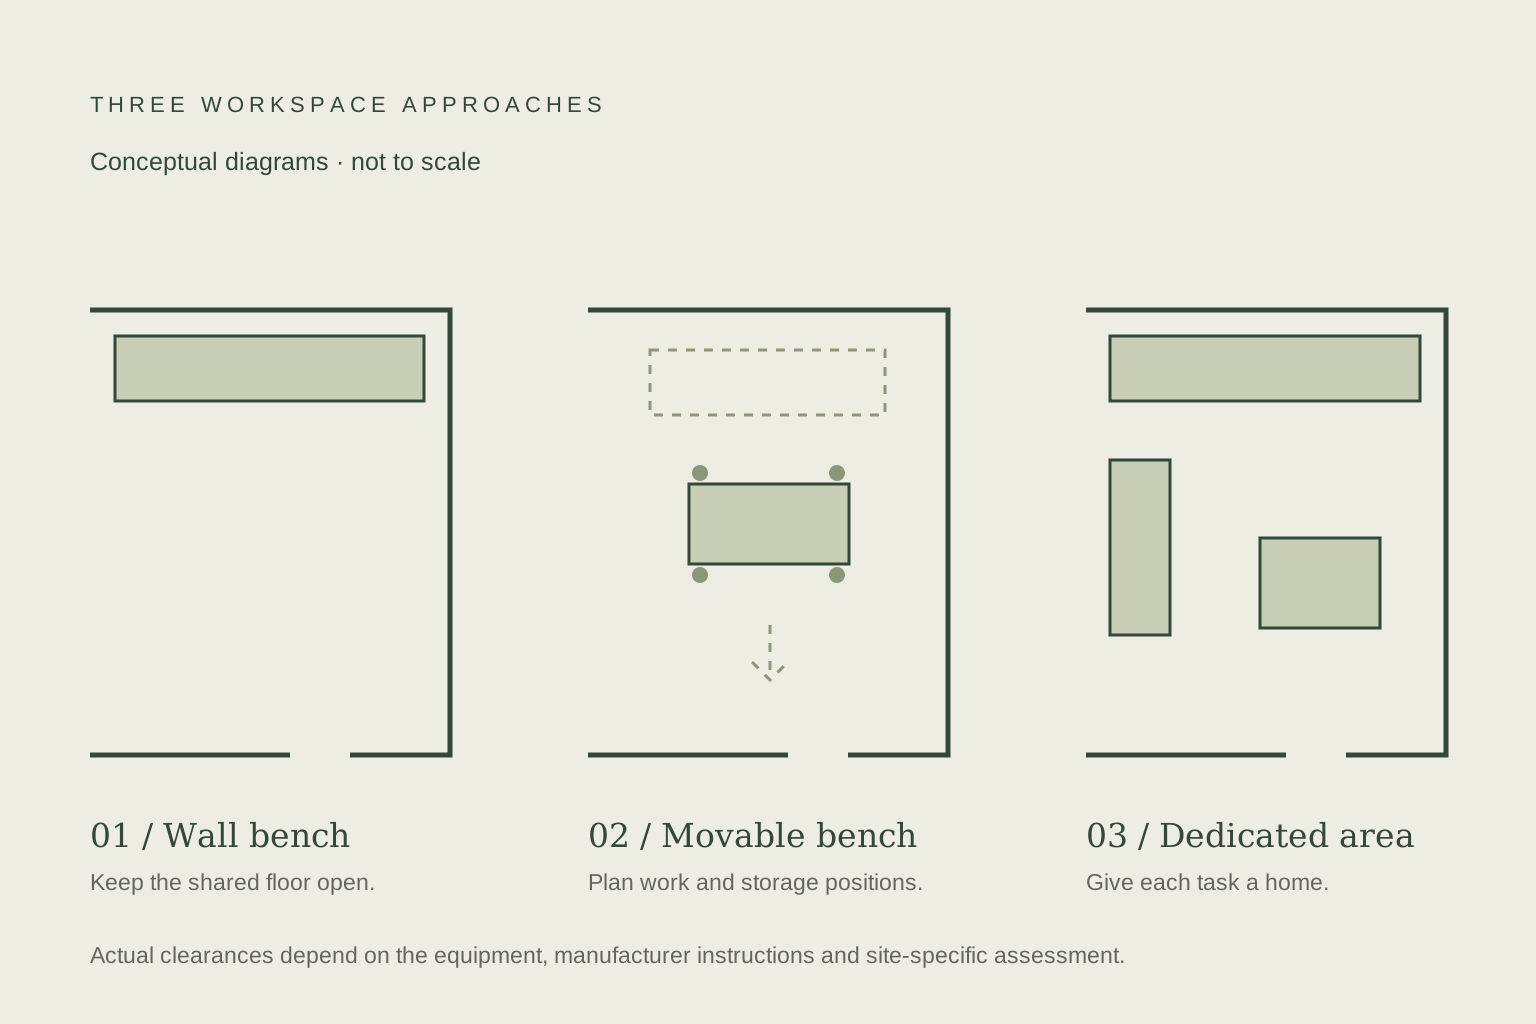
Option 1: a bench along one wall
A wall bench keeps a defined working surface at the edge of a shared room. It can suit hand-tool work, assembly and small repairs when the surrounding conditions are appropriate. Put the tools used most often near the working position and store larger items separately.
The tradeoff is limited access around a project. Long materials may need room beyond the ends of the bench, and a garage may still need parking space. Draw the full task footprint, not just the furniture. If the plan only fits while doors are shut or storage blocks an exit, revise it.
Option 2: a workspace that moves
A movable bench can let a room change between storage and project use. Before choosing one, consider its weight, stability, caster and locking design, surface height and the equipment that might sit on it. A movable surface is not appropriate for every tool or task.
Plan two positions: where the bench works and where it is stored. Mark the route between them. Avoid placing a work surface where it obstructs the garage door, vehicle movement or access to services. Follow the bench and tool manufacturers’ instructions rather than improvising a mobile machine base.
Option 3: a dedicated work area
A dedicated room gives materials and projects a consistent home. It can also reduce the repeated setup involved in a shared garage. It still needs suitable conditions: lighting, access, equipment clearance and a plan for dust, noise and any required electrical work.
Start with a small number of stations instead of filling every wall. Leave space to move materials and test whether the sequence of tasks feels sensible. A dedicated area is useful only if its boundaries and systems suit the activities performed there.
Compare the layouts on paper
Draw each candidate at a simple scale, such as one square representing one foot. Add the bench, stored materials and equipment as separate pieces of paper so you can move them. For machinery, add the operating space required by the manufacturer as well as the equipment footprint.
Walk through material arrival, measuring, work, assembly and cleanup. Consider how another person would pass through the room while a project is underway. Do not choose the option with the most storage if it makes those basic movements awkward.
What to resolve before buying
Confirm which activities the space can support, whether the building owner or local rules impose restrictions, and what professional work is needed. Dust and fire hazards deserve attention before machines are installed. OSHA’s woodworking resources explain common workplace hazards; they are useful background, not approval of a home layout.
Use our printable planning checklist to gather the questions. Start with the simplest suitable layout and expand after real projects show what is missing.
Planning notes & sources
For equipment clearances and technical setup, follow manufacturer instructions and the requirements for your own home.
OSHA: Woodworking hazards and solutions